Our company only collects the necessary data and respects your privacy, in accordance with the General Law for the Protection of Personal Data 13.709/2018. By continuing, you confirm that you have read and accepted the Privacy Notice. Privacy Policy.

Medal Pt Br Medal Es

Medal Group

7 Tips for Adjusting Pop Up Sprinklers?

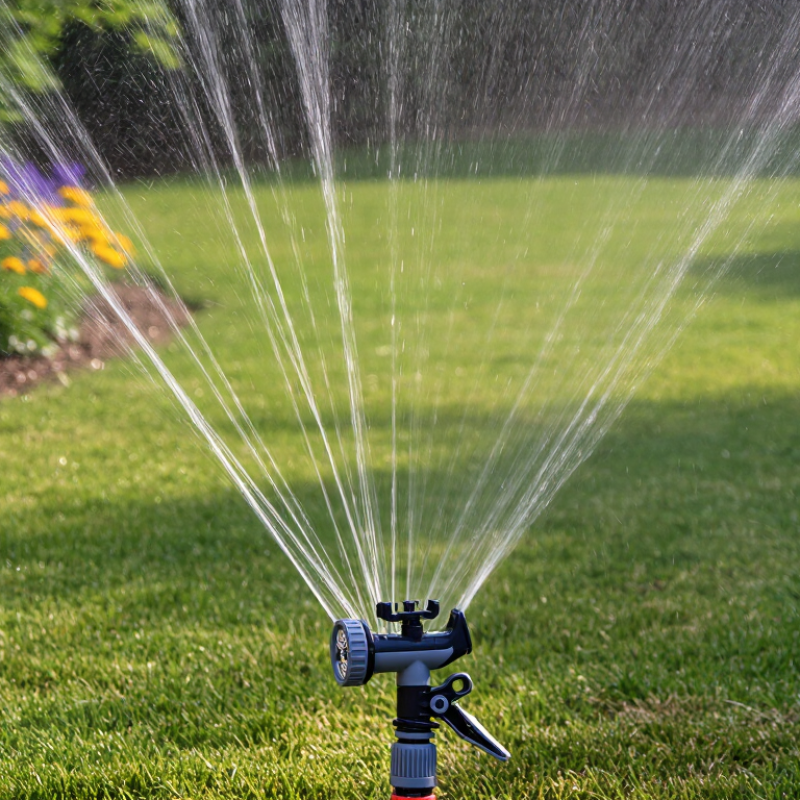
A healthy lawn rarely depends on more water; it depends on water placed accurately. When a pop-up sprinkler sprays unevenly, dry patches, puddles, and runoff can appear within minutes. Adjusting Pop Up Sprinklers is a practical skill for homeowners, groundskeepers, and anyone responsible for efficient irrigation. The work involves more than turning a screw. You need to observe the spray pattern, check pressure, and protect the nozzle from damage. A clean filter, level sprinkler body, and correctly matched nozzle can change the result. This guide presents seven useful tips for making those adjustments carefully and consistently.

Each tip is based on common irrigation practice and should be compared with the sprinkler manufacturer’s instructions. Models differ, so a setting that works in one garden may waste water in another. Start with the system running, then watch where every drop lands. Use a flat screwdriver only when the adjustment mechanism allows it. Never force a stuck screw. That lesson is easy to overlook. We will consider arc settings, distance control, nozzle selection, alignment, pressure, cleaning, and seasonal checks. Small changes often produce visible improvements beside a walkway or flower bed. Still, not every problem is an adjustment problem. A damaged seal, clogged supply line, or weak pressure may require professional inspection. I have found that rushing this task creates extra work, especially after replacing a nozzle. Take notes, test one change at a time, and accept that the first setting may be imperfect. Reliable irrigation comes from careful observation, measured changes, and regular review—not guesswork.

7 Tips for Adjusting Pop Up Sprinklers?

Check Pop-Up Sprinkler Spacing and Head-to-Head Coverage

A well-adjusted pop-up sprinkler system starts with spacing, not guesswork. In field checks, I measure the distance between heads and compare it with each spray radius. Head-to-head coverage means one sprinkler should reach the next sprinkler’s base. This pattern reduces dry strips and uneven growth. Avoid placing heads too far apart. The lawn may look green after rain, then reveal pale patches during hot weather.

Check the layout, spray angle, arc, and nozzle condition. Keep corner heads at 90 degrees and edge heads near 180 degrees. Full-circle heads belong in open areas.

Adjust each pop-up head slowly while the water runs. Watch the spray reach its neighboring head. Clean blocked filters and replace damaged nozzles. Low pressure can shorten the spray distance, so do not solve every dry spot by increasing the watering time. Sometimes the real problem is poor spacing.

Walk the lawn after one cycle. Look for misting, runoff, tilted heads, and water hitting walls or paths. A small adjustment can save water. I have occasionally trusted a perfect-looking plan and missed a shaded corner. That was a useful mistake. Measure again after planting changes or soil settling. Leave enough room for maintenance equipment, but keep coverage continuous. Local water rules may also limit watering schedules, so verify them before making seasonal changes.

Set Operating Pressure Near the Typical 30–45 PSI Range

7 Tips for Adjusting Pop Up Sprinklers

Set operating pressure near the typical 30–45 PSI range. This range usually supports a clean spray pattern and steady pop-up movement. Check pressure with a reliable gauge while the zone is running. Static pressure can look acceptable, yet operating pressure may drop sharply.

Inspect the filter before changing any adjustment screw. A blocked filter can imitate low pressure and weaken every nozzle. Confirm that each sprinkler stands level with the soil surface. Then adjust the spray distance to prevent water from hitting sidewalks or dry areas. Use the smallest practical arc for corners and narrow planting beds. Watch the spray during a full cycle, not just for a few seconds. Wind can make a good setting appear faulty.

Small changes matter. Turn adjustments slowly and observe the nearest and farthest heads. If pressure rises above 45 PSI, misting and uneven coverage may appear. If it falls below 30 PSI, the stream may collapse before reaching the next head.

I once blamed a worn sprinkler for poor coverage, but a partially closed valve caused the problem. That mistake was useful. Pressure readings are not perfect. Recheck them at different times, especially when several zones share the same supply. Replace damaged seals, clear blocked nozzles, and examine visible leaks before increasing pressure. Water should land evenly, with light overlap between neighboring patterns.

Adjust Nozzle Arc, Radius, and Flow for Uniform Distribution

7 Tips for Adjusting Pop-Up Sprinklers

Adjust the nozzle arc to match the planting area, not the sidewalk. A half-circle nozzle should water a straight edge, while a quarter-circle nozzle fits a corner. Turn off the water before changing the nozzle. This prevents sudden spray and makes small adjustments easier. Tip three: check the nozzle’s alignment after installation. A slightly crooked head can leave a dry strip beside the curb.

Set the radius with the adjustment screw, using short turns. Watch the spray pattern after each change. Do not reduce the distance too sharply, or the stream may become uneven. Flow also matters. If one sprinkler throws weakly, check for a clogged filter, damaged nozzle, or low pressure. I once reduced several radii at the same time and created dry patches between heads. The layout looked efficient, but it was not. Measure the overlap instead. Nearby heads should usually reach each other for more uniform coverage.

Use catch cups to compare water depth in different zones. Place them near edges and in the center. Run the system for a fixed period, then compare the collected water. Adjust arc, radius, or flow where the results differ. Keep spray off walls and paved surfaces. Recheck after mowing, soil settling, or seasonal pressure changes. Small errors become visible later. Record each adjustment, even if it seems minor. That simple note can prevent repeated guesswork.

7 Tips for Adjusting Pop Up Sprinklers? - Adjust Nozzle Arc, Radius, and Flow for Uniform Distribution

Tip Adjustment Area Recommended Setting or Target Typical Field Data How to Check Uniformity Common Correction
1 Match the spray arc to the landscape Use 90° for corners, 180° for edges, and 360° for open areas. Common arc settings: 90°, 180°, 270°, and 360°. Water should remain inside the planting area without spraying walls, paths, or buildings. Reduce the arc or realign the fixed side of the nozzle if overspray is visible.
2 Set the spray radius Adjust the radius so the stream reaches the planned coverage boundary. Typical pop-up spray radius: approximately 2.4–5.5 m, depending on nozzle type and pressure. Measure from the sprinkler head to the farthest consistent wetting point. Turn the radius adjustment screw clockwise to shorten distance; turn it counterclockwise to increase distance, where supported.
3 Balance head-to-head coverage Place or adjust sprinklers so each head reaches the next head or approximately 50–100% of the neighboring radius. For a 3.0 m radius, spacing is commonly about 3.0–4.5 m, depending on wind and site conditions. Use catch cups or small containers arranged in a grid to identify dry gaps and excessive overlap. Correct spacing, radius, or nozzle selection instead of increasing run time alone.
4 Control the flow rate Use matched-flow nozzles within the same irrigation zone whenever possible. Small spray nozzles often deliver about 2–8 L/min; actual flow varies with arc, radius, and pressure. Compare pressure and visible spray strength at the first and last heads in the zone. Replace mismatched nozzles, clean clogged filters, or divide an overloaded zone.
5 Verify operating pressure Operate within the nozzle’s rated pressure range and avoid excessive misting. Many spray systems perform near 2.1–3.4 bar, or 30–50 psi; check the irrigation design specification. Install a pressure gauge at the valve or test point while the zone is running. Use pressure regulation where pressure is too high; inspect pipes, valves, and flow restrictions when pressure is too low.
6 Keep the nozzle and filter clean Remove dirt, sand, grass clippings, and mineral deposits before making final adjustments. A partially blocked nozzle can produce a reduced radius, distorted pattern, or uneven flow. Observe the spray pattern for missing streams, fine mist, pulsing, or irregular distribution. Shut off the water, remove the nozzle and filter if accessible, rinse with clean water, and reinstall securely.
7 Fine-tune runtime after adjustment Adjust runtime only after arc, radius, pressure, and flow are correct. A common starting point for turf is 10–20 minutes per cycle, then modify according to soil, weather, and catch-cup results. Check soil moisture 75–100 mm below the surface and look for runoff or standing water. Use shorter cycles with a soak period on compacted or sloped soil; reduce frequency during cool or rainy weather.
Practical target: After adjustment, the catch-cup volumes across the test area should be as consistent as possible, with no obvious dry strips, excessive runoff, or overspray. Recheck the system at the beginning of each irrigation season and after nozzle, pressure, or landscaping changes.

Level and Align Sprinkler Heads 1–2 Inches Above Turf

Adjusting pop-up sprinklers starts with height, not spray direction. Turn off the water and remove soil around each head carefully. Check whether the body sits vertically and rests on firm ground. For turf areas, position the sprinkler head 1–2 inches above the grass surface when the installation design requires that clearance. This helps the spray rise above thick blades and reduces blocked patterns. The head must remain level. A tilted head can create dry strips on one side and muddy patches on the other. Add compacted soil around the body, but avoid loose backfill that may settle after watering.

Use these seven practical checks during adjustment. Clear dirt from the nozzle and filter. Align the fixed spray edge with the intended boundary. Set the arc to avoid paths, walls, and paving. Adjust the radius until water reaches the neighboring head. Confirm the pop-up stem rises smoothly. Watch for leaks around the connection. Finally, run the system for several minutes and inspect the turf closely. Use a small level if available. It provides a more reliable result than judging by eye.

I once corrected a head that looked straight but was installed over soft soil. It leaned again after two watering cycles. That mistake taught me to firm the base before fine adjustments. Do not raise a head with random spacers. Use compatible parts and recheck clearance after mowing. If water remains on a walkway, reduce the arc or reposition the head rather than increasing pressure. Small changes usually produce better coverage.

Pop-Up Sprinkler Head Height Reference

For reliable pop-up sprinkler operation, set the sprinkler head approximately 1–2 inches above the turf surface. Check that each head is vertical, level with neighboring heads, clear of grass and soil, and able to rotate without obstruction. Adjust the spray pattern, clean blocked nozzles, inspect for leaks, and test coverage after leveling.

Measure Precipitation Rates and Apply the 1-Inch Weekly Rule

7 Tips for Adjusting Pop-Up Sprinklers

Measure precipitation before changing sprinkler run times. The U.S. Environmental Protection Agency’s WaterSense program reports that landscape irrigation uses nearly 9 billion gallons daily in the United States. Small adjustments matter. Place six straight-sided cans across one sprinkler zone. Run the system for 15 minutes, then measure each can with a ruler. Add the depths and divide by the number of cans. Multiply the average by four to estimate hourly precipitation.

Use that rate to follow the one-inch weekly rule, but treat it as a starting point. Many lawns need less during cool, cloudy weeks. Sandy soil may need shorter, more frequent cycles. Clay soil needs slower watering. Adjust the sprinkler head, check its filter, and remove blocked nozzles.

Keep water off sidewalks. Set the arc carefully. Match the head’s spray pattern to the planting area.

Divide one inch by your measured weekly precipitation. For example, a 0.5-inch-per-hour zone needs two hours weekly. That time should be split into shorter cycles, such as four 30-minute sessions. The Irrigation Association recommends auditing distribution uniformity, because uneven coverage can leave dry patches beside puddles. I once trusted the timer alone. That shortcut failed. A rain gauge near the lawn changed my settings more accurately. Recheck precipitation after repairs, seasonal growth, or nozzle replacement. The one-inch rule is useful, not perfect.