Why Choose a Wall Hole Saw for Clean Cuts?
Clean cuts do not happen by accident. They begin with the right cutting method, steady handling, and a tool matched to the wall material. A Wall Hole Saw can create a controlled opening for pipes, cables, vents, and recessed fixtures. Its circular teeth follow a defined path. This helps reduce chipped plaster, torn drywall, and uneven edges around the opening.
Tooling specialist James Carter explains, “A good Wall Hole Saw removes material in a controlled circle, not through unnecessary force.” That principle matters on real job sites. Excess pressure can overheat the teeth. It can also damage the wall behind the cutting surface. A sharp saw, suitable speed, and firm alignment usually produce cleaner results. Small details matter.
The practical advantage becomes clear when the cut must remain visible. Imagine a bathroom wall with fresh paint, or a finished office partition with concealed wiring. A rough opening may require extra filler, sanding, and repainting. A cleaner hole can shorten that repair process. It may also improve the final fit of a cover plate or pipe collar.
Still, a Wall Hole Saw is not a perfect solution for every wall. Dense masonry, hidden wiring, and embedded pipes require careful inspection before cutting. Even experienced installers can misjudge what lies behind the surface. That uncomfortable possibility deserves attention. Clean cutting should never replace safe preparation.
This guide examines tooth design, cutting depth, material compatibility, dust control, and practical handling. It also considers common mistakes. The goal is simple: better holes, less damage, and more predictable results.
What Is a Wall Hole Saw and How Does It Work?
Why Choose a Wall Hole Saw for Clean Cuts?
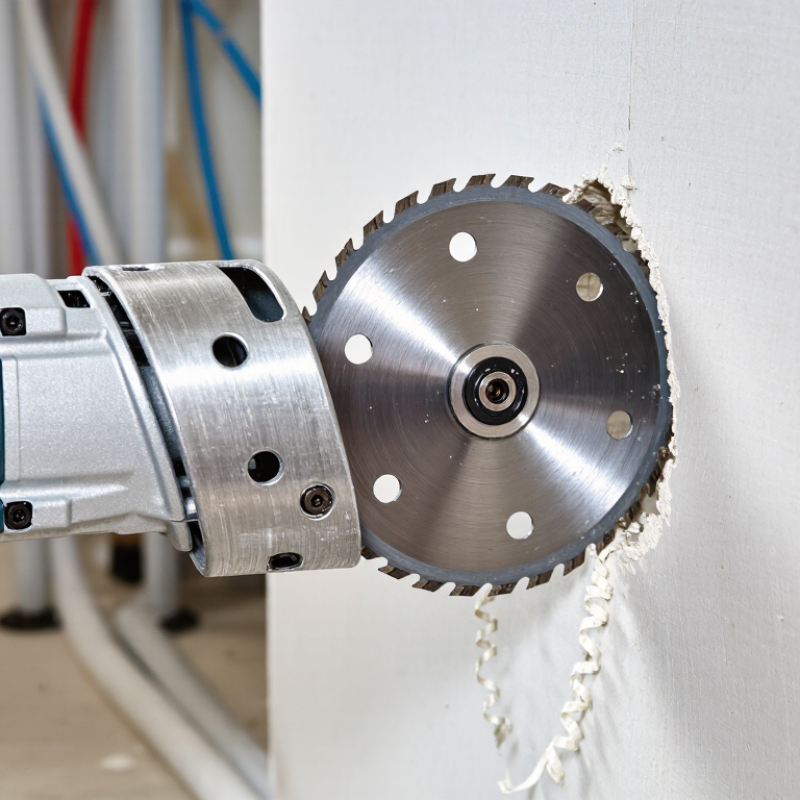
A wall hole saw is a circular cutting tool designed for controlled openings in drywall, wood, brick, or masonry. It usually includes a toothed cup, an arbor, and a pilot bit. The pilot bit enters first and keeps the cutter centered. Then, the outer teeth score the wall along a fixed circle.
In practice, the tool works best with steady pressure and moderate speed. Let the teeth cut gradually. Do not force the drill. For drywall, sharp teeth create a clean edge with less tearing. Masonry requires carbide or diamond-grit cutters, plus dust control. Always scan for pipes and cables before drilling. A neat hole is not worth hidden damage.
The U.S. Environmental Protection Agency reported about 600 million tons of construction and demolition debris in 2018. Accurate cutting can help prevent unnecessary wall removal and material waste, although the reduction depends on the job. OSHA’s respirable crystalline silica standard sets a permissible exposure limit of 50 micrograms per cubic meter over eight hours. This matters when cutting masonry or concrete. Use extraction, suitable ventilation, and approved respiratory protection when required.
A wall hole saw still needs judgment. The wrong tooth design can chip plaster or overheat quickly. I have found that marking the center twice prevents many alignment errors. Small mistakes remain visible. That is the honest part. Clean cuts come from the tool, the material, and the operator’s restraint.
Which Materials Can a Wall Hole Saw Cut?
Why Choose a Wall Hole Saw for Clean Cuts?
A wall hole saw can cut several common building materials when matched with the correct tooth design. It works well on drywall and gypsum board, leaving a round opening for cables, pipes, or electrical boxes. Fine-tooth versions can also cut softwood, plywood, and some composite panels. The result is usually cleaner than using a standard hand saw.
Some models are suitable for plastic sheets, laminate, and thin non-ferrous metal. However, material thickness matters. A tool designed for drywall may struggle with dense plywood or metal. In my experience, forcing the saw creates rough edges, heat, and uneven holes. That is easy to underestimate. Always check the cutting specification before starting. Do not assume one hole saw suits every wall.
Tips:
Mark the center clearly and confirm that no hidden wiring or plumbing lies behind the surface. Use steady pressure instead of pushing hard. For drywall, moderate speed helps prevent tearing. For wood, secure the panel to reduce vibration. When cutting plastic, pause occasionally to control heat. Wear eye protection and remove dust with care. A test cut on scrap material can reveal problems early. It may feel unnecessary, but it often prevents a damaged wall and a poorly fitted cover plate.
How Does Its Design Produce Cleaner, More Accurate Cuts?
A wall hole saw produces cleaner cuts through controlled geometry, not brute force. Its pilot drill enters first, holding the center while the toothed cup follows the same path. This reduces wandering on drywall, plywood, and thin panels. A rigid arbor also keeps the cutting edge perpendicular to the surface. That matters around electrical boxes, where a few millimeters can affect the final fit.
Tooth spacing removes material in small, repeated bites. Deep gullets carry chips away instead of packing them between the teeth. A thinner kerf removes less wall material and reduces resistance. Variable tooth height can limit vibration, especially when the saw crosses paint, plaster, or layered board. The result is usually a rounder opening with less surface breakout. Small detail. Big difference.
In practical work, the design is only half the result. Excessive pressure can bend the cup and tear the paper face. I once assumed slower drilling always improved accuracy; it did not. A sharp saw, steady feed, and correct speed mattered more. Dust control still deserves attention. OSHA limits respirable crystalline silica exposure to 50 micrograms per cubic meter over an eight-hour shift, while NIOSH recommends 50 micrograms as a ten-hour limit. These figures support using extraction when cutting masonry-based panels. A clean edge is valuable, but a clean workspace matters too.
What Factors Affect Wall Hole Saw Cutting Performance?
Why Choose a Wall Hole Saw for Clean Cuts?
Cutting performance depends on more than the saw’s advertised diameter. In practical wall work, material hardness, tooth design, and tool control often decide the result. Drywall cuts easily. Masonry does not. A fine-toothed cutter can leave a neat edge in softer board, while masonry requires carbide grit or hardened teeth. Using the wrong cutter causes vibration, chipped plaster, and a hole larger than planned.
A compatible arbor and sharp pilot bit improve alignment, especially on a vertical surface. Excessive speed creates heat and dulls cutting edges. Too much pressure can crack brittle tile or compress gypsum. Steady pressure works better. For masonry, a slower setting and controlled pauses help clear dust from the kerf. Vacuum extraction also improves visibility and reduces abrasive buildup around the teeth. Wall thickness matters too. A short cutter may stall against backing board or insulation.
Before cutting, I check the surface, locate likely services, and confirm the required opening size. It matters. Experienced installers keep the drill square and avoid forcing a dull tool. Even then, results are not perfect. I have occasionally blamed the hole saw for a ragged edge, then found that my pressure was uneven. This small mistake shows why technique, maintenance, and wall condition must be considered together. A clean cut often begins before the tool touches the wall.
How Can You Use a Wall Hole Saw Safely and Effectively?
Why Choose a Wall Hole Saw for Clean Cuts?
How Can You Use a Wall Hole Saw Safely and Effectively?
A wall hole saw can create a round opening with less surface damage than a general-purpose blade. Use the correct diameter and cutting type for drywall, timber, tile, or masonry. Read the tool’s rated speed before starting. A pilot drill should touch the marked center, not a hidden cable or pipe. Check both sides of the wall when access allows. This small step prevents expensive surprises.
Wear safety glasses, hearing protection, and a suitable dust mask. OSHA’s silica standard, 29 CFR 1926.1153, limits respirable crystalline silica exposure to 50 micrograms per cubic meter over eight hours. Masonry cutting can produce dust quickly, so use local extraction or controlled wet methods when the tool permits them. Keep hands behind the cutting path. Secure loose clothing and remove nearby obstacles. NIOSH recommends limiting occupational noise exposure to 85 decibels over eight hours. Hole saws can become loud in enclosed rooms.
Start slowly and let the teeth work. Do not force the cut. Excess pressure can overheat the arbor, damage the wall, or cause sudden tool movement. Stop when resistance changes unexpectedly. Inspect the opening afterward for sharp edges and hidden damage. My own practical mistake was rushing the final section; the cut looked clean, but the backing material splintered. A slower finish would have been better. Always isolate power before checking obstructions or changing accessories.



 Close
Close